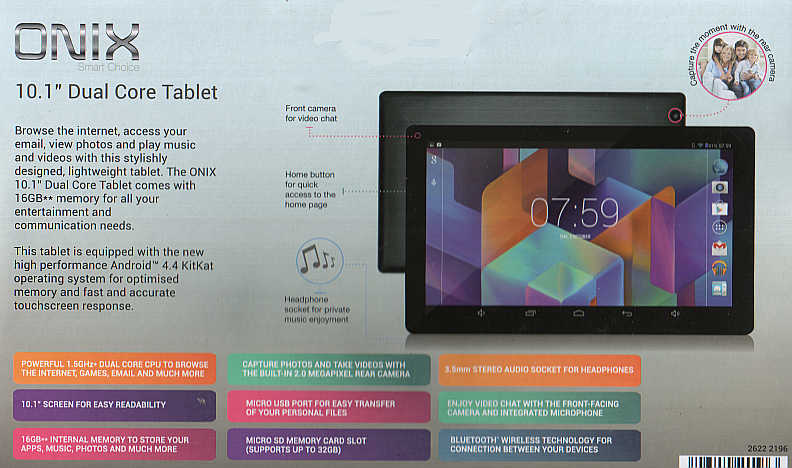
ONIX Tablet 10.1" Android 4.4.2
Compiled by: Waldis Jirgens. Latest update: 18th May 2015.
Note that the usual disclaimer applies:
If you use this information here, don't blame me, should you, your data, or your Tablet get hurt!
If you use this information here, don't blame me, should you, your data, or your Tablet get hurt!
General
The ONIX Tablet runs under Android 4.4.2. It has 1 mini USB port and one Micro SD card slot. Aldi sold it for just under 100$ in December 2013. It comes with a USB cable and a hard to understand manual, that sometimes uses different terms for the same object. Not everything works as documented there. There are NO description of the installed applications in the manual.
When you first get it, you have to charge the battery via the USB port, the attached cable and a (separate) USB charger or PC USB port. Takes around 1h or so.
It works also with the charger connected, just like a laptop/netbook.
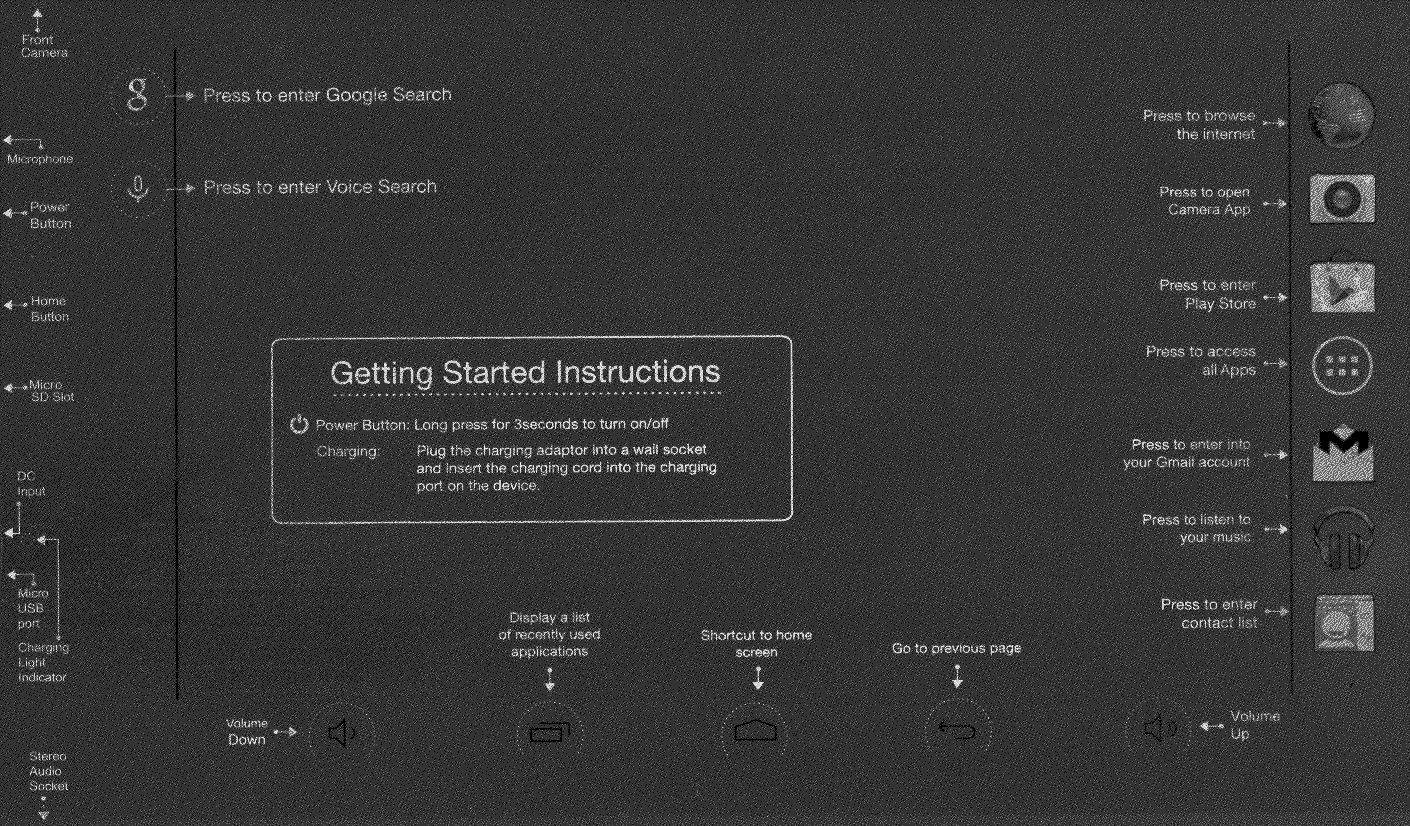
A translucent foil covers the screen of the tablet. It has descriptions of the ports and buttons on the rim of the tablet and explanations of the cryptic symbols on its screen.
You are supposed to memorise the lot and then to remove the foil. The tablet works however with the foil attached as well.
The DC Input socket is not described anywhere. You can use it to recharge the battery. Use 5V and + in the centre.
Starting the Tablet
With the tablet in landscape position and the rim with the
buttons to the left push the button at the very top of the
rim at least for 3 seconds. A circled padlock will
appear. Drag it off the left rim of the screen. If the
camera icon appears drag it off the bottom rim.Connecting to A Wireless Network (WiFi)
This was no problem with my home network. It's done by running the "Settings" application and specifying the correct parameters in the "WiFi" function.Installing Applications
There are of course applications installed, when you get the tablet. But some are missing and some are very rudimentary. To install applications first you have to download them as .apk files, go to the file manager and tip (or press) with your finger on the name. The system will ask you if you want to install the file, and if you say yes, allow the installation of non-Google approved applications if that is specified in the "Settings" application. Google then asks you,if you want it to rummage through your tablet intermittently and check this and that. I always decline this offer. Slowing down the computer is one of the reasons. Privacy is another.I installed the following: Ghost Commander file manager and ftp client, F-Droid repository list, Jackpal terminal emulator, Textedit editor, Shark browser (which does NOT work) and AndroidPdfViewer_1_0_1.
De-installing applications can be done via the Settings application.
Using Applications
Starting applications is done by first getting to the "home"
screen by pressing the icon at the bottom in the middle,
that looks like a large flat house There is no REAL difference between the two, a "Widget" is an application using some parameters. Not all applications fit on the screen. so you can drag the current screen (select a space between the icons to do that) to the left and get the next one, until there are no more. As soon as you see the application that you want select it by tipping its icon with your finger.
In true Android style it is not easy to STOP an application. Very few applications have this facility provided. For the others stopping can be done as follows:
- Press the icon at the bottom middle/slightly_left, that
looks like "punched cards" or "stacked windows".

- Some smaller windows will appear.
- Press on the one, denoting the application you want to stop and drag it quickly to the bottom in a straight line.
- Repeat this process until all the applications that you want to stop ARE stopped.
Web Browsing
The standard browser is VERY rudimentary compared to a "real" one, but web pages can be displayed and one can watch embedded flash videos like with YouTube. Operating facebook and web-mail is pretty straight forward. The key bindings are strange when compared to Linux or Windows.Playing Video Files
Video file formats that can be played are: 3gp, avi, flv, mpg or mpeg, mov, qt. Video file format that cannot be played is: ogv. I have not tested any other formats.Viewing Image Files
All of the following can be displayed: jpg or jpeg, gif, png. The latter is best viewed with the Ghost Commander Image Viewer.File Transfer
Ghost Commander allows to transfer files via ftp. It is also a two panel file manager which makes life easier. It needs some "getting used to".For instance FTP is available by going to Location "Home" (tap the dotted bar top right of the screen, then "Location" then "Home") and selecting "FTP site" from there, followed by entering the IP address, username and password. Ghost Commander has all the functionality of Midnight Commander under Linux - more than adequate!
PDF Viewer
The system comes WITHOUT a pdf viewer, I installed AndroidPdfViewer_1_0_1 from http://sourceforge.net/projects/andpdf/?source=typ_redirect. There are others too. It seems to be working satisfactorily,Terminal Emulator
The terminal emulator allows a few commands known from Linux. Most importantly it allows to run bash-alike shell scripts. This is done by entering sh scriptname . The script itself need not have the executable option set. To really fully exploit the power of the terminal emulator and associated scripts you will need a keyboard that has the Cntrl and Alt keys available. Sadly these are missing with the on-screen "soft" keyboard.Note: The syntax of the "let" command in Android 4.4.2 is just like the one used in the Linux bash shell. This is a change from Android 2.2.1, needing the shell scripts written for the older version to be updated to be usable on this version of the Android shell.
Text Editor
The text editor allows very basic text editing, Useful for writing scripts and simple files. It gets very slow when you edit the beginning section of a large file. If you want to do some real editing a real keyboard and a mouse is a must to avoid extreme frustration. They can be attached to the USB port via a conversion cable (micro USB plug to regular USB socket) and a USB hub. Such a keyboard is also required if you want to run my scripts shcreate and sheditandro (described here). Don't forget to change the "let" commands (see the lines starting with #).Camera
There are 2 cameras, 1 looking out from the back of the tablet and the other from the front (for "selfies"). It is also possible to take a panorame shot.Photos that you take with this built-in cameras (don't expect good quality - any cheap digital stand-alone camera produces better ones) are stored in /sdcard/DCIM/Camera
Useful Links
Here is a GPL Freeware Repository
Another Freeware Repository
Shell Scripting Guide
Android Scripts (GitHub)
